
So you've taken the plunge into vibe coding, and whether you're prompting your way through Lovable, letting Cursor autocomplete your vision, or experimenting with v0, you're not alone.
The lines between design and development aren't just blurry anymore.
They're practically nonexistent, and AI tooling is finally making "just build the thing you're imagining" actually possible. But, with so many shiny tools and zero established rules, it's easy to get overwhelmed, distracted, or completely lost in the sauce.
You might find yourself bouncing between tutorials, drowning in feature lists, or worse, never actually shipping anything at all. Here's how to cut through the noise and actually get something done that feels good to use and good to make.
1. Pick One Tool and Stick With It (For Now)
Jumping between tools can feel productive.
You tell yourself you're "exploring the ecosystem" or "finding the right fit." You're not. You're procrastinating with extra steps.
The reality: Every tool has a learning curve, its own quirks, and specific ways of thinking about problems. When you constantly switch, you never get past the honeymoon phase where everything feels possible but nothing actually works.
What to do instead: Pick one tool based on what excites you most right now. Not what's "objectively best" or what the internet says you should use. Here's a quick decision framework:
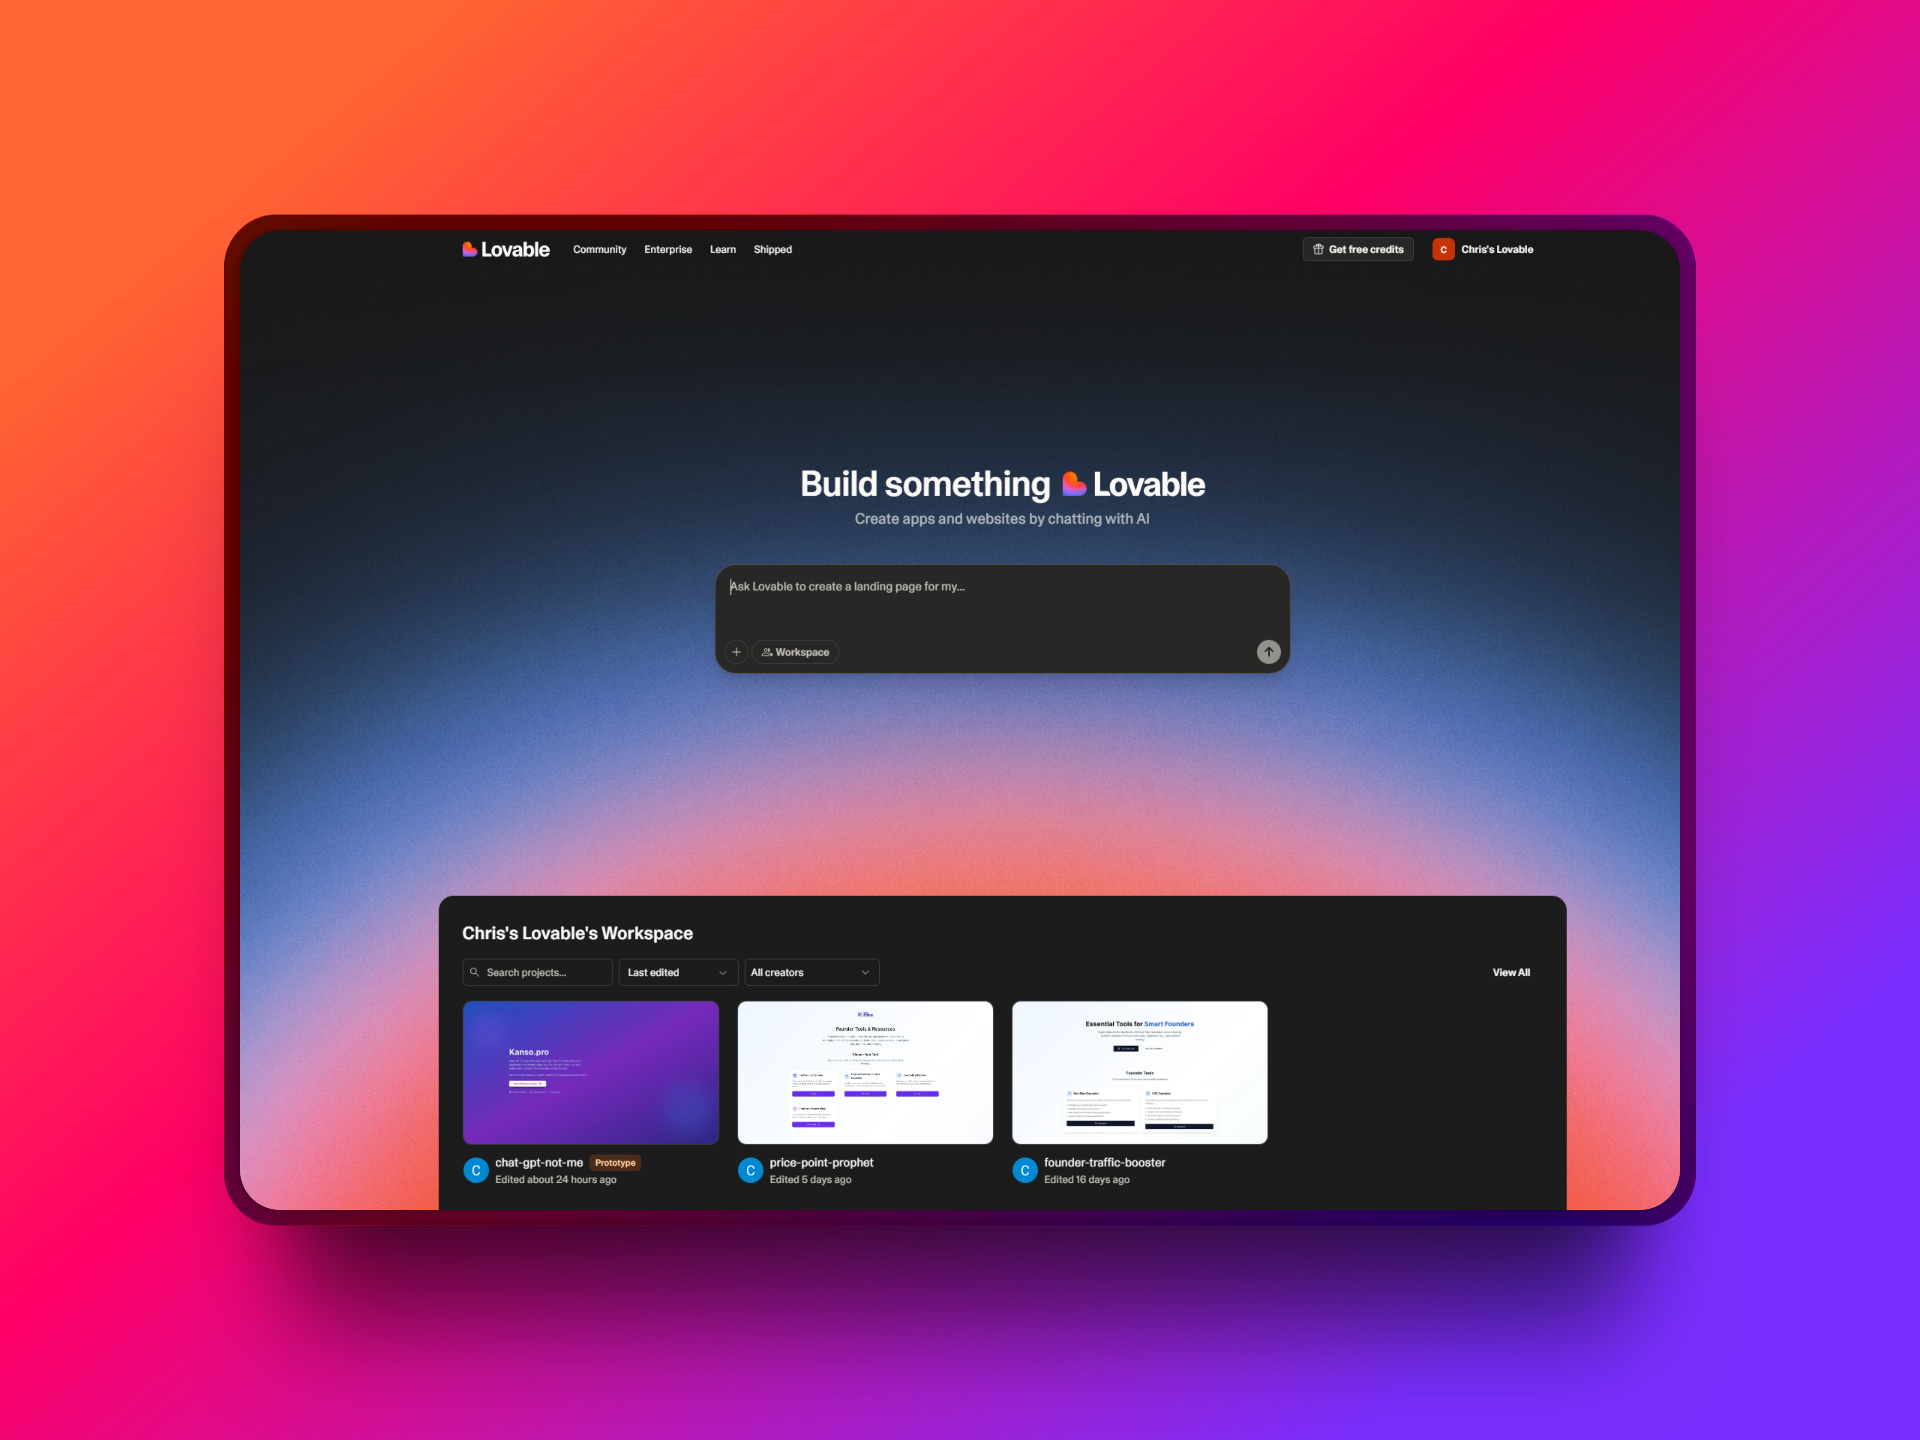
- Lovable: Perfect if you want to go from idea to deployed app through conversation. Great for when you can describe the vibe but don't want to get bogged down in implementation details.
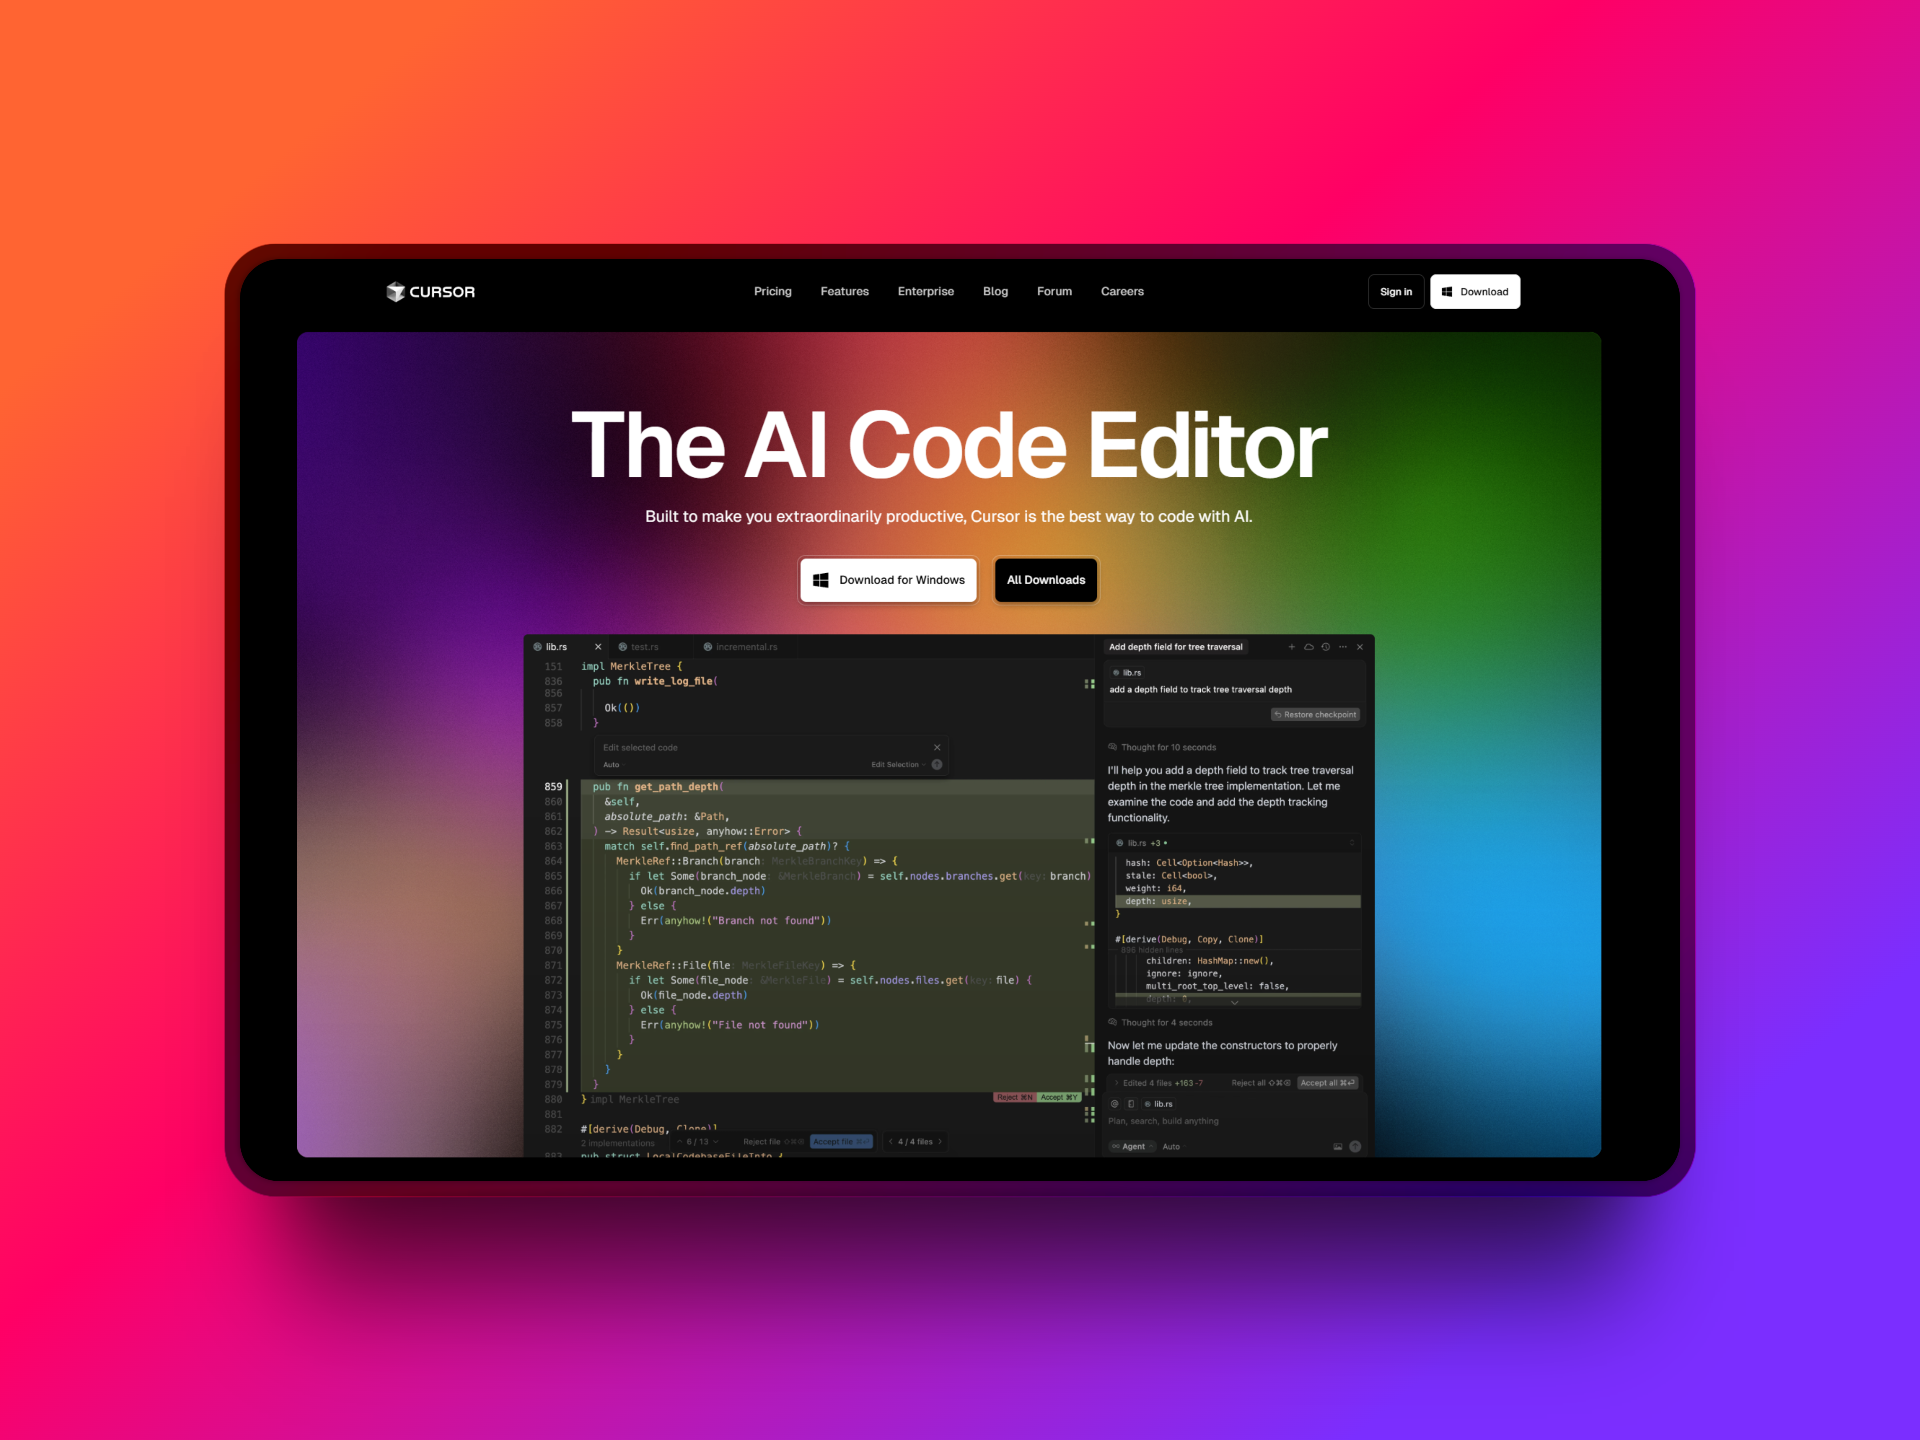
- Cursor: Your choice if you like the feel of traditional coding but want AI to handle the tedious parts. Ideal for when you want to learn while building.
- v0 by Vercel: Excellent for rapid UI prototyping. Type what you want, get React components that actually work.
- Claude/ChatGPT + Artifacts: Great for experimenting with interactions when you want to iterate quickly on ideas through conversation.
- Replit Agent: Choose this if you want a full development environment that responds to natural language.
Commit to your choice for at least a month. Learn its shortcuts, understand its limitations, and push against its boundaries. Familiarity beats flexibility when you're starting out, you can always expand your toolkit later.
2. Don't Aim for a Full App. Aim for a Moment
This is where most people go wrong. They think "vibe coding" means building the next Instagram, but with better animations. It doesn't.
The magic is in the micro-moments: A scroll animation that makes content feel like it's floating into view. A button that gives satisfying haptic feedback. A loading state that's so smooth people don't mind waiting. A hover effect so unexpected it makes someone smile.
Start with these bite-sized wins:
- A card that tilts as your mouse moves across it
- Text that scrambles and resolves when you hover
- A progress bar that feels organic, not mechanical
- A cursor that leaves a subtle trail
- A form input that guides you with gentle animations
These small interactions are what separate memorable experiences from forgettable ones. They're also achievable in a single session, which means you'll actually finish them instead of abandoning them in a folder labeled "projects I'll totally finish someday."
Pro tip: Keep a running list on your phone of tiny interactions you notice and think "that's clever." Your future self will thank you for the inspiration.
3. Steal Like a Magpie (But Make It Your Own)
Let's get one thing straight: waiting to be completely original is a creativity killer. Every designer and developer you admire started by copying, remixing, and reimagining work they found inspiring.
Where to hunt for inspiration:
- Dribbble: Filter by "Animation" or "Interaction" for motion-rich examples
- CodePen: Search for terms like "hover effect," "scroll animation," or "micro-interaction"
- Figma Community: Look for interactive prototypes and component libraries
- Awwwards: The cutting edge of web design, though sometimes impractical
- Collect UI: Curated UI patterns with lots of interaction examples
- Mobbin: Mobile app patterns that translate well to web
The learning process:
- Find something that makes you go "ooh"
- Try to recreate it exactly first
- Then ask: "What if I changed the timing?" "What if I used different colors?" "What if I applied this to a completely different element?"
- Build your version
This isn't cheating. It's how you develop your eye and build your muscle memory. Even Picasso said "good artists copy, great artists steal." The key is to understand why something works before you remix it.
4. Show What You're Working On (Especially the Messy Bits)
Social media has trained us to only share polished, final results. This is a mistake when you're learning, because the real value, for you and for others, happens in the messy middle.
Why sharing WIP (work-in-progress) matters:
- You get feedback when it's still useful, not after you've already committed to a direction
- People love following along with creative processes. It's inherently engaging content
- You build accountability and momentum
- You discover that everyone's process is messier than their Instagram suggests
What to share:
- Screen recordings of broken animations (with a laugh-cry emoji)
- Before/after comparisons showing tiny improvements
- "I spent 3 hours on this 2-second transition" confessions
- Questions like "Does this feel too bouncy or not bouncy enough?"
Where to share:
- Twitter/X with relevant hashtags (#webdev, #designdev, #framer)
- Design Discord communities
- LinkedIn if you want to build your professional brand
- TikTok or Instagram Reels (seriously, short coding videos perform well)
Format tips:
- GIFs are perfect for showing interactions
- Short videos (15-30 seconds) work better than long explanations
- Always include a quick description of what you're trying to achieve
The magic happens when you realize that sharing your struggles makes you more relatable, not less professional.
5. Set a Time Limit (And Actually Stick to It)
Vibe coding is dangerously addictive. "I'll just tweak this easing curve" turns into a 6-hour rabbit hole where you're rebuilding your entire animation system at 2 AM.
Why time limits work:
- They force you to focus on what actually matters
- They prevent perfectionist paralysis
- They keep the process fun instead of stressful
- They help you ship more, iterate faster
Suggested time blocks:
- 30 minutes: Perfect for tiny experiments or copying a single interaction
- 60 minutes: Sweet spot for most micro-interactions
- 90 minutes: Good for slightly more complex ideas or combining multiple effects
- Never go beyond 2 hours in a single session. You'll lose perspective
The timer trick: Start your timer when you open your tool, not when you "start coding." Setup and exploration time counts too.
When the timer goes off:
- Save your work (even if it's broken)
- Take a screenshot or screen recording
- Write one sentence about what you learned
- Walk away
You can always come back tomorrow with fresh eyes. Often, the solution you were struggling with becomes obvious after a break.
Beyond the Basics: Leveling Up Your Vibe Game
Once you've got the fundamentals down, here are some ways to push your work further:
Master the Fundamentals of Motion
- Easing curves: Linear motion feels robotic. Ease-in-out feels natural. Ease-in feels heavy. Ease-out feels light.
- Timing: Fast interactions (100-200ms) feel responsive. Slow interactions (300-500ms) feel thoughtful. Anything over 500ms better be worth the wait.
- Layered animation: Don't animate everything at once. Stagger elements by 50-100ms for a more organic feel.
Think Beyond the Screen
- Sound design: A subtle audio cue can make a visual interaction feel 10x more satisfying
- Haptic feedback: If you're designing for mobile, consider how vibration patterns complement your animations
- Performance: The smoothest animation in the world means nothing if it makes the page stutter
Build Your Taste
- Follow motion designers on social media
- Study how your favorite apps handle transitions
- Pay attention to interactions in the real world. How does a good door handle feel? How does water move?
Document Your Learnings
Keep a simple note-taking system for:
- Techniques that worked well
- Common mistakes you make
- Resources that were particularly helpful
- Ideas for future experiments
The Bigger Picture: Why Vibe Coding Matters
This isn't just about making things look cool (though that's fun too). Good micro-interactions:
- Reduce cognitive load by guiding users through interfaces
- Provide feedback that makes digital interactions feel more human
- Create emotional connections that make products memorable
- Communicate personality in ways that static design can't
In a world where most digital experiences feel generic and soulless, the ability to craft interactions that feel good, that have a distinct vibe, is becoming a genuine competitive advantage.
Common Pitfalls (And How to Avoid Them)
The Feature Creep Trap: You start with a simple hover effect and end up rebuilding Three.js from scratch. Stick to your original scope.
The Perfection Paralysis: You spend hours tweaking an animation curve that no one will notice. Good enough is often good enough.
The Tool Obsession: You convince yourself you need to learn five more tools before you can create anything good. You don't.
The Comparison Game: You see amazing work online and assume you're not ready to share your "simple" experiments. You are.
Your Action Plan for Tomorrow
- Choose your tool (spend maximum 15 minutes deciding)
- Find one interaction that inspires you
- Set a 60-minute timer
- Try to recreate it
- Share what you made, even if it's broken
- Repeat tomorrow
That's it. No grand plans. No perfect setups. Just consistent, small experiments that compound over time.
The best vibe coders aren't the ones with the most technical skills or the fanciest tools. They're the ones who consistently make things, share them, and iterate based on feedback.
They understand that the goal isn't to create the next revolutionary interface. It's to make digital interactions feel a little more human, a little more delightful, one micro-moment at a time.
The tools are here. The community is welcoming. The only thing left is to start.
Now get in there and make something that feels good.
TL;DR: The Five Rules of Vibe Coding
- One tool. Learn it well. Stop tool-hopping and get familiar with one platform's quirks and capabilities.
- Build tiny things. Focus on micro-interactions that create moments of delight, not full applications.
- Copy to learn. Find inspiring interactions and recreate them, then make them your own.
- Share your process. Post works-in-progress, ask for feedback, and build in public.
- Keep it short and fun. Use time limits to maintain momentum and prevent burnout.
Remember, the goal isn't perfection. It's progress, consistency, and making digital experiences that feel genuinely good to use.